Object Menu is a special menu where we can transform (move or even change the position and shapes) any element or objects. Transform has many other sub options. There is Move an option which opens a dialog box which has an option to copy and paste an element and place it in a given distance. There is an option called Scale, which gives an option to enlarge the selected element according to the given percentage. We have an option to Rotate the element which is selected to a given degree. There is also an option to Shear the selected element to a given degree. We can also rotate an element to 90 degree or 180 degree and also flip it to Horizontal or Vertical. There is also an option to Clear all transformations. There is also an option Transform Again which transforms an element even more.
We have an option to send a selected element Bring to Front, Bring Forward, which makes it to bring it to front if it is placed on a background or any other element which behaves like a layer placed in front of it. We also have an option to Send Backward, Send to Back, which places the selected element to backward. We also have an option to Select First Object Above, Next Object Above, Next Object Below, Last Object Below. There is also an option to select an object which is in a container (this is told in Edit Menu, when an object is Placed Into). Also to select an object which is Previous and Next Object.
We use a Keyword called Spread, which denotes the page and the pasteboard on an active page. We have an option to Group and Ungroup Multiple Objects. There is also an option to Lock an individual object and also Multiple Objects. There is also an option to Unlock all on Spread which unlocks all objects on a page which is active. We can even Hide a selected object on page and also Show all on Spread. We have an option to Insert HTML code into InDesign page.
We have an option to Generate QR Code into InDesign, which has multiple options to convert Web Hyperlink, Plain Text, Text Message, Email and Business Card. We can use this option to place QR code into our design, which can be scanned by all scanners, including mobile phones, which have the option to scan QR codes.
We have an option called Text Frame Options, which gives a control to convert a given paragraph text box to multiple columns, including the ability to inset spacing and other text options. There is also an option to insert a stroke between the columns and define even the position and height of the stroke. Even the ability to change the colour of the stroke and its thickness. There is also an option to resize the text block to vertical and also horizontal blocks. There are also other options, which are not so useful in designing space.
The options in Object menu is defined by effects which can be applied to a paragraph text block. There are many ways which can be used in InDesign to arrange it. These are explained briefly in this article and will be continued in next article.
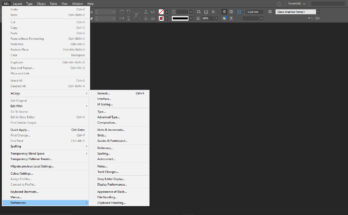
Below Text Frame Options there is an option called Fitting, which is the continued part of a command in Edit Menu called Paste Into. This has options to fit the content in a frame according to the users wish. There is also an option to convert a Content from Graphic to Text and back.
Next comes the options which stylizes or changes the Effect of the text to various forms.
- Transparency – Which reduces the percentage of colour of the given element making them transparent.
- Drop Shadow – This gives a show below the selected object. It has options to customize the depth, darkness and length of the shadow. We can even change the colour of the shadow.
- Inner Shadow – This creates a shadow inside the selected object to make it appear like a shadowed outline
- Outer Glow – This creates a glow outside the selected object
- Inner Glow – This is same as Inner Shadow but with different options.
- Bevel and Emboss – This is a special command which gives an effect that the object to which this is applied appears to come out of the artwork. This has various options like soft emboss, sharp emboss and others. It has options to increase the depth of the emboss and also change the density of colours of the emboss.
- Satin – This is little darker form of inner glow, with other options.
- Basic Feather – This feathers the edge of the object to which it is applied.
- Directional Feather – This feathers all the four directions of the object with percentage which we define.
- Gradient Feather – This feathers the selected object or element in any one direction we specify.
- Clear all Effects – This removes the effects described above which is applied to an object.
- Clear all Transparency – This removes any transparency which is applied to an object.
We also have an option to convert a square or rectangle box with little rounded corner with the option called Corner Options, which can be customized according to the user. This can be applied to any one direction and also to all four directions.
There is an option called Paths which is used while drawing some complex drawings and we need to join 2 nodes. InDesign itself looks after the artwork. There is another option called Pathfinder, which will be explained later.
We also have an option to Convert Shape of any object to anything:
- Convert to Rectangle – This makes the object which is selected to a rectangle
- Rounded Rectangle – This makes the object which is selected to a rounded cornered rectangle
- Beveled Rectangle – This makes the object which is selected to rectangle with cut corners
- Inverse Rounded Rectangle – This makes the object which is opposite to rounded cornered rectangle
- Ellipse – This makes the object in the shape of ellipse
- Triangle – This makes the object selected in the shape of Triangle
- Polygon – This makes the object selected in the shape of 6 sided object
- Line – This converts the object selected to a line which is tilted to 45 degree
- Orthogonal Line – This converts the object selected to a straight line Horizontally
There is also an option to change the Display Performance which helps while working on high resolution images. The images makes the file to read slowly. At that time we can change the display performance to Fast Display, Typical Display or High Quality Display according to our requirement.