The print dialog box in Adobe InDesign has many options to tell. It is mix of many options which if given correctly will get our print in a proper format.
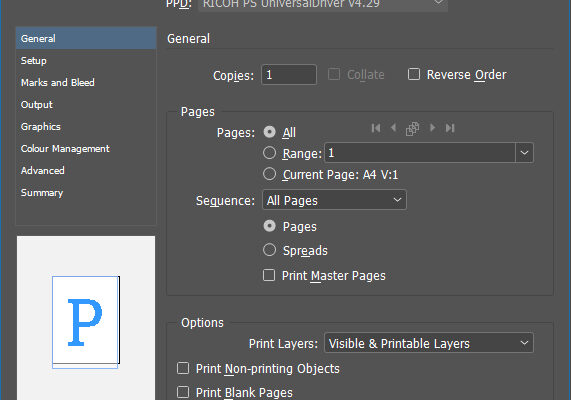
As we go to File Menu and click on Print, it opens the dialog box. We can use any printer driver for this, even any printer which we use. But for explaining, I am using a postscript driver called “RICOH PS UniversalDriver“. It has a Printer Driver and a Postscript Printer Description (PPD). This clearly denotes that the printer we use has a particular description, which controls the printer.
We can find the number of copies we can take, it is customizable as this denotes a particular page or number of pages in the document. We have 3 options to select the number of pages in the document for printing. We can select All, Range, and Current Page. There is also an option to print Even Pages and Odd Pages under the Sequence option. We even have the option to print spreads (this is the facing pages which we can see if we select the facing pages option while creating a new file or after creation, we can select facing pages in the document settings command.
There is also an option to select particular Layers while printing. It has 3 options, All Layers, Visible Layers, Visible and Printable Layers. We can select any option of our choice but the default is Visible and Printable Layers. There are also 3 options called, Print Non-printing objects (this denotes the objects which while designing if we select non-printing for any element. It does not get printing if we do not select this option. Sometimes in a spread, we need to insert blank pages that normally do not get printed. To print it we should select this option. We can also print the grids and guides in our document if they are visible by selecting the option.
There are also other options that are helpful while printing. If we click on the setup button which is at the bottom left of the dialog box, it opens a window where we should select “Print to File“. This is helpful while we create a .ps file from an open file. This is helpful to convert the file to a pdf format. Here also we can select the required ppd, if it is not selected at top of the dialog box. We can even save the options we select using save preset button. We can come out of the option after saving or we can click cancel.

Other options to look out for is the Setup button which is on the left of the Print Dialog Box. Here we can select the required Paper Size. It also shows the dimension of the paper size. It will be mm or inches or any other, which we select while creating the file. There is also the orientation of the page on how it should get printed. There is also a scale option. This is used if we want a bigger size or smaller size of the artwork while taking the print of the file. We can deselect the option to Constrain Proportions, to take a print while we put different percentages while taking print. We can even select the position of the artwork on the page while printing. For example, the artwork is a visiting card and we need to print it on an A4 size page. If we do not give the position while printing, it will print the visiting card on the default position as upper left on the page. If we select the center option, the print will be at the center of the page. The other 2 options below it are not so useful.

Next is the option called Marks and Bleed. Here we can give automatic cutmarks to an artwork that is taken for offset printing or which requires bleed and the paper should be cut exactly to the given position. There is also bleed marks and registration marks, which is used while printing a multicolour artwork on an offset printer. There is also colour bars, which explains the colour density in the given file and also page information, which is helpful while making a plate.
The option which is on the right side of it is the setting where we can customize the size of the cutting mark and its thickness. The default measurements used by the printers are the stroke weight should be .5 points and offset should be 3 mm.
Next comes the Bleed and Slug settings. We can leave it as default where the “Use Document Bleed Settings” selected or we can customize it if we deselect it. It is the bleed settings we give if our document has bleed all around the artwork. This helps while we cut the artwork. If we did to give bleed to our artwork and it gets printed, then while the colors mix, it shows a small white gap from the cutting area to the artwork. So it is recommended to give 3 mm bleed to our artwork. It is just extending the background to 3 mm outside the page. If we give 3mm here in Top, Bottom, Left, and Right. It helps while cutting the paper.
Next is the Output option. This shows the colours we have used in our file. It shows any pantone colours, spot colours or any other format of colours. The default is the Composite CMYK. This forces all other formats of colours to get colour separation to Cyan, Magenta, Yellow and K – This is denoted as Key colour and not as a colour Black. (CMYK). In any multi-colour jobs, it even shows the colour angle and frequency of it. This can be seen by clicking on Ink Manager button.
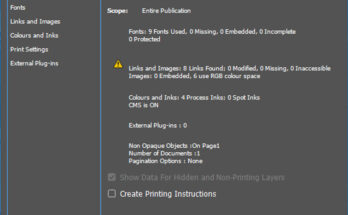
Next comes the Graphics Tab, which is basically sending the images to print dialog boxes, we should select All instead of Optimised Subsampling. Other options can be left as it is. Next we should look at the Advanced Tab, where we should select the Preset as High resolution under the Preset. Next comes the summary of the options which we have selected.
After all the options are set, we can print the job on print or even send it for positives.
